Why You'll Love It
- - Minimal prep, maximum flavor
- - Uses pantry staples you already have
- - Warm, gooey center with a crisp top
- - Perfect for impromptu gatherings
*"The best five‑ingredient dessert I've ever made—my family devoured it in minutes!"*
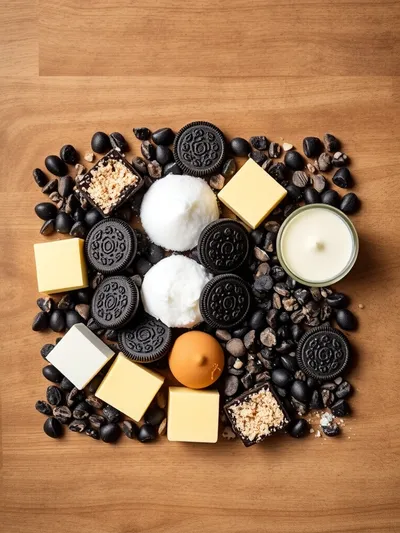
Essential Ingredient Guide
- Oreos: Choose a classic chocolate‑cream Oreo for the signature taste; crush them just enough to keep some texture.
- Butter: Use unsalted butter melted to a golden hue; it creates a buttery crust that browns beautifully.
- Chocolate pudding mix: A dry instant pudding mix adds richness without extra steps, blending into the cake base.
- Vanilla pudding mix: Balances the chocolate with a subtle vanilla note, stirring in during the batter stage.
- Milk: Whole milk yields a creamier texture; simply combine with the pudding mixes.
- Optional whipped topping: A dollop of whipped cream adds a light, airy contrast to the dense cake.
Complete Cooking Process
-
Ingredient Readiness:
Gather all five ingredients, pre‑measure the butter, and break the Oreos into generous chunks.
-
Flavor Development:
The butter melts and mingles with the pudding mixes, creating a deep chocolate‑vanilla aroma as it bakes.
-
Texture Control:
Evenly spread the Oreo pieces on top; they will soften yet retain a slight crunch, giving the cake its signature bite.
-
Finishing Touches:
Add a swirl of whipped topping or a dusting of powdered sugar just before serving.
-
Serving Timing:
Serve warm, straight from the oven, for the ultimate gooey experience; the cake firms slightly after ten minutes.
- Use room‑temperature butter for even melting
- Do not over‑mix the batter; a few lumps are fine
- Let the cake rest a few minutes before cutting
- Pair with a scoop of vanilla ice cream for extra indulgence
Pro Tips
Well, those little adjustments make a world of difference. I’ve found that letting the cake sit for just a couple of minutes after it comes out of the oven lets the flavors settle, and the edges become delightfully crisp. So, take a breath, enjoy the aroma, and then slice into that warm, chocolaty goodness.
The essence of the dish:
A fun fact or historical angle:
Flavor or sensory focus:
You Must Know
- Do not over‑bake; the cake should stay slightly fudgy
- Cool on the pan for 5 minutes to set the layers
- Serve warm for the best texture
Frequently Asked Questions
→ Can I use gluten‑free Oreos?
Yes, substitute with a certified gluten‑free chocolate cookie; the texture and flavor remain delightfully similar.
→ How do I store leftovers?
Refrigerate in an airtight container for up to three days; reheat gently in the microwave or oven.
→ Can I add nuts for extra crunch?
Absolutely—sprinkle chopped pecans or walnuts on top before baking for a nutty dimension.
→ What ice cream pairs best?
Vanilla bean or caramel ice cream complements the chocolate richness perfectly.
→ Is this recipe suitable for a vegan diet?
Swap butter with coconut oil and use a plant‑based milk; the result stays indulgent.
→ Can I make this in a muffin tin?
Yes, divide the batter equally; bake 12‑15 minutes for individual servings.
Chef's Tips
If the top browns too quickly, loosely cover with foil for the last few minutes.,For extra richness, swirl a spoonful of chocolate syrup into the batter before baking.,A pinch of sea salt sprinkled on top enhances the chocolate flavor.
Nutrition Facts
per serving
420
Calories
5g
Protein
48g
Carbs
22g
Fat
Taste Profile
Rich chocolate sweetness with buttery depth
Ingredient Substitutions
Don't have an ingredient? Try these alternatives
Adds a faint coconut aroma; use the same amount.
Provides a lighter texture; keep the same volume.
Recipe Variations
Try these delicious twists on the original
Spicy Version
Add a pinch of cayenne pepper to the batter for a subtle heat that balances the chocolate.
Mediterranean Style
Mix in crumbled feta and chopped pistachios after baking for a sweet‑savory twist.
Common Mistakes to Avoid
Learn from others' mistakes for perfect results
- Over‑mixing the batter, leading to a dense texture
- Baking too long, which dries out the center
- Using low‑fat butter, resulting in a soggy crust
Meal Prep & Storage
Make Ahead Tips
You can whisk the pudding batter up to 24 hours ahead; store it covered in the fridge and bring to room temperature before baking.
Leftover Ideas
Reheat gently in a skillet over low heat, adding a splash of milk to restore moisture.
Perfect Pairings
Serve this with...
Cooking Timeline
Preheat oven and gather ingredients; crush Oreos.
Whisk pudding mixes with milk and melted butter.
Pour batter into dish and scatter crushed Oreos on top.
Bake until golden; let rest before serving.

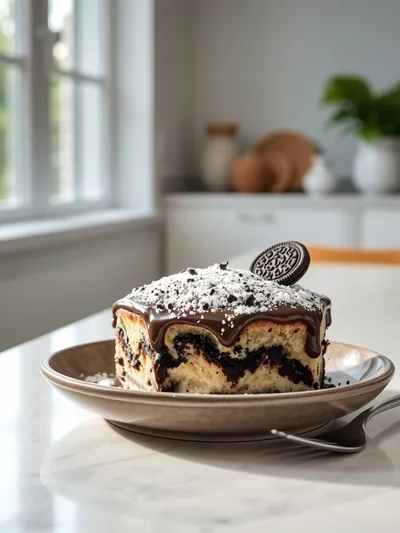
Oreo Dump Cake – Simple 5 Ingredient Dessert
Indulge in a quick Oreo dump cake with just five ingredients—perfectly moist, chocolatey, and ready in minutes for any sweet craving.
Timing
Prep Time
10 Minutes
Cook Time
20 Minutes
Total Time
30 Minutes
Recipe Details
Ingredients
Main Ingredients
- 01 1 (15‑oz) package Oreo cookies, crushed
- 02 1/2 cup unsalted butter, melted
- 03 1 cup chocolate instant pudding mix
- 04 1 cup vanilla instant pudding mix
- 05 2 cups whole milk
Instructions
Preheat the oven to 350°F (175°C). Lightly grease a 9‑inch square baking dish.
In a mixing bowl, whisk together the chocolate pudding mix, vanilla pudding mix, and milk until smooth; stir in the melted butter.
Pour the batter into the prepared dish, spreading evenly. Then, generously scatter the crushed Oreos over the top, pressing lightly.
Bake for 20‑25 minutes, or until the edges are golden and the center is set but still slightly soft. do nothing cake inspired this hands‑off approach.
Remove from the oven, let rest for 5 minutes, then serve warm with optional whipped topping.
Notes & Tips
- 1 If the top browns too quickly, loosely cover with foil for the last few minutes.
- 2 For extra richness, swirl a spoonful of chocolate syrup into the batter before baking.
- 3 A pinch of sea salt sprinkled on top enhances the chocolate flavor.
Tools You'll Need
-
9‑inch square baking dish
-
Mixing bowl
-
Whisk
-
Measuring cups
-
Spatula
Must-Know Tips
- Don't over‑mix the pudding batter; a few lumps are fine
- Let the cake sit briefly before slicing to allow layers to set
- Taste the batter for sweetness; adjust with a touch of sugar if desired
Professional Secrets
- Room temperature butter melts evenly, preventing soggy crust
- Baking at a steady 350°F creates a uniform rise without drying out the center
- Allow the cake to rest; residual heat continues to finish cooking the interior

Recipe by
NicoleJane Doe is the culinary heart and voice behind Your Website, a vibrant personal blog that celebrates home‑cooked goodness for the modern American kit ...
Get Delicious Recipes Weekly
Join 25,000+ home cooks getting our best recipes straight to their inbox.
Free forever • No spam • Unsubscribe anytime