Why You'll Love It
- - Simple ingredients you probably already have
- - Quick to assemble, ready in under 30 minutes
- - Warm, melty cheese that pulls apart beautifully
- - Perfect for sharing or a solo indulgence
*"These sliders are the perfect balance of juicy meat and melty cheese—my kids can’t get enough!"*
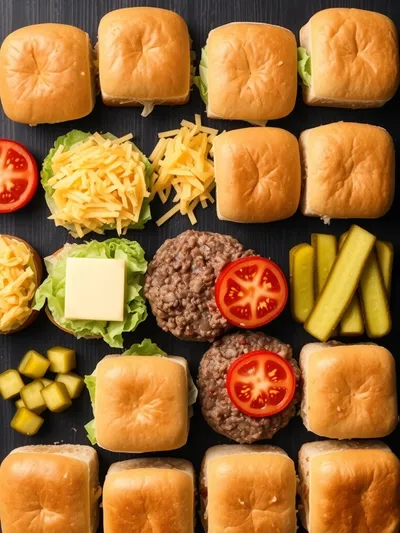
Essential Ingredient Guide
- Ground beef: Choose 80/20 ground beef for a juicy texture; it stays moist while cooking.
- American cheese: Slice thinly so it melts quickly and blends with the beef.
- Slider buns: Soft brioche buns add a buttery sweetness that balances the savory filling.
- Onion: Finely diced for a subtle sweetness that deepens as it caramelizes.
- Pickles: A splash of acidity cuts through the richness and adds a bright crunch.
- Butter: A little butter on the buns creates a golden crust and extra flavor.
Complete Cooking Process
-
Ingredient Readiness:
Gather and measure everything before you turn on the heat; this keeps the cooking smooth and prevents over‑cooking.
-
Flavor Development:
Sauté the onions until translucent, then add the beef; let it brown for that deep, savory base.
-
Texture Control:
Add the cheese while the meat is still in the pan; stir gently so it melts into the beef without becoming a stringy mess.
-
Finishing Touches:
Toast the buns with butter for a crisp edge, then spoon the cheesy beef onto each roll.
-
Serving Timing:
Serve immediately while the cheese is still gooey; the warmth of the buns adds a comforting contrast.
- Use a hot skillet to achieve a quick sear on the beef.
- Pat the beef dry with a paper towel before cooking for better browning.
- Add a tiny pinch of smoked paprika for a subtle smoky nuance.
- Let the sliders rest for a minute after plating to let flavors settle.
Pro Tips
I often find that those small pauses make a difference. Yeah, letting the sliders sit for just a minute lets the cheese settle a bit, so each bite is balanced. Also, when you toast the buns, listen for that gentle crackle – it tells you they’re ready. So, take a breath, enjoy the aroma, and then dive in.

The essence of the dish:
A fun fact or historical angle:
Flavor or sensory focus:
You Must Know
- Don’t over‑mix the beef; it stays tender.
- Keep the heat medium‑high for a quick sear.
- Toast the buns just until golden.
Frequently Asked Questions
→ Can I use turkey instead of beef?
Yes, ground turkey works well; just add a bit of olive oil to keep it juicy.
→ What cheese melts best?
American cheese melts smoothly, but provolone or mozzarella are good alternatives.
→ How do I keep the sliders warm?
Place them on a warm oven rack at 200°F (90°C) for up to 20 minutes.
→ Can I make them ahead of time?
Prepare the beef‑cheese mixture in advance; reheat in a skillet before assembling.
→ Are these sliders gluten‑free?
Swap the buns for gluten‑free rolls or use lettuce wraps.
→ What’s a good side dish?
A simple cucumber salad or sweet potato fries complement the richness.
Chef's Tips
If the beef seems dry, add a splash of beef broth before melting the cheese.,Feel free to crumble a bit of cooked bacon (or turkey ham) for extra crunch.,You can prep the beef‑cheese mixture a day ahead; keep refrigerated and reheat gently.
Nutrition Facts
per serving
320
Calories
16g
Protein
22g
Carbs
18g
Fat
Taste Profile
Savory with a creamy cheese finish
Ingredient Substitutions
Don't have an ingredient? Try these alternatives
Adjust cooking time for turkey; it cooks faster and stays juicy when not over‑cooked.
These cheeses melt well but may add a sharper flavor.
Recipe Variations
Try these delicious twists on the original
Spicy Version
Add a pinch of red pepper flakes to the beef and a drizzle of sriracha for heat.
Mediterranean Style
Swap American cheese for feta, include olives and sun‑dried tomatoes in the topping.
Common Mistakes to Avoid
Learn from others' mistakes for perfect results
- Overcrowding the pan, which steams the beef instead of browning.
- Adding cheese too early, causing it to burn.
- Not buttering the buns, leading to a soggy bottom.
Meal Prep & Storage
Make Ahead Tips
You can prepare the beef‑cheese mixture up to a day ahead; keep refrigerated and reheat gently before assembling the sliders.
Leftover Ideas
Reheat gently in a skillet with a splash of water; serve on fresh buns for best texture.
Perfect Pairings
Serve this with...
Cooking Timeline
Prep all ingredients – dice onion, slice cheese, butter buns.
Sauté onion, add beef, brown and season.
Stir in cheese until melted; toast buns in a separate pan.
Assemble sliders, add pickles and optional toppings, serve.

Chopped Cheese Sliders Recipe
Juicy chopped cheese sliders that melt in your mouth, perfect for a quick snack or a relaxed lunch. The buttery buns, savory beef, and a gentle blend of cheese create a comforting bite that feels like a warm hug from your kitchen.
Timing
Prep Time
15 Minutes
Cook Time
15 Minutes
Total Time
30 Minutes
Recipe Details
Ingredients
Main Ingredients
- 01 1 lb ground beef (80/20)
- 02 6 slider buns (soft brioche or your favorite)
- 03 6 slices American cheese
- 04 1 small yellow onion, finely diced
- 05 2 tbsp butter, softened
- 06 4 pickles, sliced thin
- 07 Salt and pepper to taste
Optional Toppings
- 01 Lettuce leaves
- 02 Sliced tomato
- 03 A drizzle of ketchup or mustard
Instructions
Heat a large skillet over medium‑high heat; melt 1 tbsp butter and add the diced onion, cooking until soft and fragrant, about 3 minutes.
Add the ground beef, breaking it up with a spatula. Season with salt, pepper, and a pinch of smoked paprika if desired. Cook until browned, about 5‑6 minutes.
Lay the cheese slices over the hot beef; stir gently so the cheese melts and blends into the meat, creating a creamy, chopped‑cheese mixture.
While the meat cooks, spread the remaining butter on the inside of each bun and toast them cut‑side‑down in a separate pan until golden.
Assemble each slider: place a generous spoonful of the cheesy beef on the bottom bun, add pickles, and optional toppings, then crown with the top bun.
Serve warm, maybe alongside a crisp cucumber salad. If you love cheesy baked breakfast sliders, you’ll find the same comforting melt here.
Notes & Tips
- 1 If the beef seems dry, add a splash of beef broth before melting the cheese.
- 2 Feel free to crumble a bit of cooked bacon (or turkey ham) for extra crunch.
- 3 You can prep the beef‑cheese mixture a day ahead; keep refrigerated and reheat gently.
Tools You'll Need
-
Large skillet
-
Sharp knife
-
Cutting board
-
Spatula
-
Small mixing bowl
-
Plate for serving
Must-Know Tips
- Don't overcrowd the pan; cook the beef in batches if needed.
- Let the meat rest briefly after cooking to let juices redistribute.
- Taste as you go, adjusting salt and pepper to your preference.
Professional Secrets
- Room temperature beef cooks more evenly.
- High heat creates a flavorful crust on the meat.
- Deglaze the pan with a splash of water to capture any browned bits.

Recipe by
Nico AnistonJordan Miller is the culinary voice behind Your Website, a lively personal blog that celebrates everyday cooking with a dash of creativity. With a deg ...
Get Delicious Recipes Weekly
Join 25,000+ home cooks getting our best recipes straight to their inbox.
Free forever • No spam • Unsubscribe anytime